Showing posts with label easter. Show all posts

Tuesday, April 26, 2011

Water, Water, Everywhere

Whew, Hello barbwired besties!  We are so very covered with rain here in SE Oklahoma!  We just went through another tornado watch with more on the way.  We have been blessed however, many in our area have lost homes and lives.  We pray for those struggling and the safety of everyone under a watch or warning. 


Sunday we celebrated Easter.  I hope everyone had a fantastic Easter!  We had a very calm, quiet, family oriented Easter.  We awoke to the visit from the Bunny.  The barbwired kiddos seemed please with the loot.  Then on to services, to thank our Lord for his many sacrifices for us and continued blessings on us.  After church, we went to eat with the barbwired grandparents.


As is tradition for us, I made the barbwired beauty a dress.  I can recall so many beautiful dress my Mom made for me each Easter.  One in particular was my favorite, a white shift with a rainbow of flowers all down the front.  Mom had spent so many late nights, embroidering the flowers and vines from neck to hem.  It was gorgeous!  After Easter, she washed it and all of the flowers faded on to the white dress, phooey! The dress was ruined. 


Anyway, we have continued the tradition, even after disaster, LOL!  Here is the latest in the long line of dresses. 

My Mom was gracious and allowed us to shoot pictures in her garden. 
She definitely has the green thumb in the family.  
To start the dress process, the barbwired beauty
and I went to Hancock's with our 40% coupon in hand. 
She decided on this pattern:


Just in case you can not make it out it is a Simplicity pattern no: 2362. 
The barbwired beauty is smaller than a size 6,
but that is as small as the patterns go,
so I knew we would have some altering to do. 


Once I opened the pattern and we began cutting out the pieces,
 I noticed that we did not have all of the instructions. 
If this ever happens to you, you can go on the Simplicity website,
email customer service and they will email the rest of the instructions.
They were sweet and helpful. 

This was not one of their 'easy' patterns, but it was not difficult.
From the cutting to the final fitting was about 4 hours. 

Here is the side of the dress...


and the back of the dress...


I was thankful the barbwired beauty liked it.
The tradition continues!

Now we are looking at patterns for dresses to wear at church camp. 
We need to plan ahead more, this dress was completed the
night before Easter! LOL   However, it DID get done! 


She looked pretty didn't she?
Well she always does!! 


barbwired blessings to you all!!!

Amber

Loving to link up @

Monday, April 18, 2011

Egg Cups

It is always so fun to decorate eggs with the kids.  I remember being so excited after my daughter was born, to be able to look forward to decorating eggs with her.  Her very first Easter was so fun.  She was born in May, so she was almost a year old for her first Easter.   We hid eggs for her in plain sight on the ground.  She wondered the yard confused as to what she needed to do and tripped over eggs along the way! LOL  Even though she is 16 now, we look forward to decorating eggs each year. 

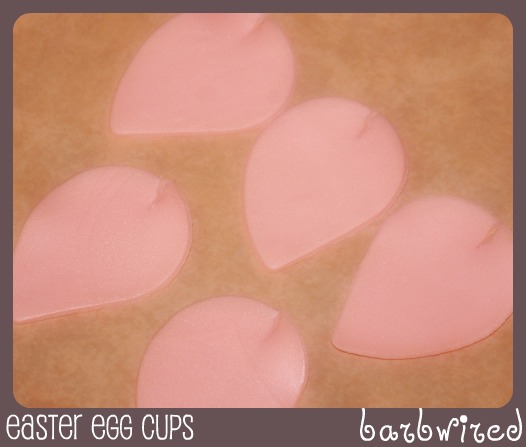
Well, since we spend so much time on those beautiful eggs, we need pretty displays for them.  This year I decided to make flower egg cups from polymer clay.


To begin our project, I conditioned polymer clay in all the colors I wanted. 
I used my pasta machine and rolled the clay to a thin sheet. 

I have a leaf clay cutter and a small circle cutter,
I used these to cut 8 petals and two centers per egg cup. 


At the base of each petal,
I cut a small slit and then over lapped these. 


I began assembling the cups with
a base of four and then four in between those. 


Once the flowers were assembled,
I place a center in the interior and base of the flower. 
 I did this to cover all the connections but also to provide a flat base.


I rolled a thin snake of the green,
wrapped it around the flowers and made a little bow.  
Just prior to baking, I make the petals droop over a bit. 


I then simply baked and they were ready to go!


We haven't yet dyed our eggs.


I used Pier 1 eggs to show you how they will look. 


Pretty stinking cute huh?


Even if we decorate some less than attractive eggs, these cups will pretty them up!


I hope everyone has a good week preparing for your Easter fun!  Let's all remember what Easter is really about.

barbwired blessings to you all!
amber


Sunday, April 17, 2011

Childhood Wishes

When I was small, I was allowed to spend the night with a friend one Saturday night, the next morning was Easter.  We awoke the next morning and the Easter Bunny had arrived.  The Mom of the family had attempted to raid the other baskets and scrap me together a sweet little basket.  Even though I was not very old, I appreciated the effort.  However, I couldn't help but be a little jealous of a precious egg nestled among the children's baskets.  It seemed to shimmer as the light touched upon it that Easter morning.  When you looked closer there was a small scene inside.  I had never before seen a sugar egg and I was mesmerized.  I even had the nerve to be horrified when the youngest family member bit right into his egg.  Well, how could he destroy such a treasure??  LOL.  I thought they were the most beautiful things I had ever seen.  I returned home that afternoon and explained the lovely item to my Mother, who quickly asked, "Why on earth would you want that much sugar?" 


Needless to say, I never had a sugar egg in my Easter basket.  Not one to ever give up...I decided to create my own version.  Mom was right, I did not need, do not need that much sugar.  So I have created a faux sugar egg.
No calories or dental visits need bother you on this beauty.

To begin I bought a paper mache egg from Hobby Lobby.


I cut a hole in it, leaving the opening for the future scene.


I then painted the egg with acrylic paints. 


I then painted our little egg with white glue
and sprinkled clear glitter on her as a nod to the sugar.


I then took some joint compound,
added my choice of acrylic paint to color it.


I placed it in a Wilton's bag with a tip
and began to decorate the glittered egg.

I then hot glued some green excelsior in the bottom of the egg.

I looked to the Graphic Fairy again for inspiration for the inside scene.

I found this cute picture that I thought would look
precious inside my faux sugar egg.


I had originally thought I would just cut this out and place
it inside the egg.  It looked a bit flat.  So I decided that
I would just recreate the pic. 

I found similar flowers and hot glued them inside.
I then hollowed out a small styrofoam egg,
painted it and hot glued it inside.


I could never find a chick that I liked. 
So I created one from polymer clay.


After baking, the chick was ready for the egg.

I simply hot glued the little guy in the scene.

The faux sugar egg was done.

Nope, it doesn't taste as good as I am sure a real
sugar egg would taste, but I think it is just as pretty!


You should really try to make one for yourself.  It was
super easy and it fulfilled a childhood wish for me.  :)

I hope your Sunday has been blessed!  Let's make this week a great one, getting ready for all the fun and beauty of Easter.  Take some time to thank God for His blessings!

barbwired blessings to all of you!

Amber


Linking up to:


http://www.iheartnaptime.net/
http://tatertotsandjello.blogspot.com/
http://www.bystephanielynn.com/


Tuesday, April 12, 2011

Creativity

I honestly feel awful if I am deprived of crafting.  Even President Roosevelt understood this feeling.  He said, "Happiness lies in the joy of achievement and the thrill of creative effort."  Yep!  Creative effort does give me a thrill.  I think it is lots of fun to make something with my own mind, hands, and love. 

So today, I am showing you something I created that I love.  Being very hard on myself this isn't something I can say very often.  Look at this and tell me what you think.


I just finished with our spring mantel.  I have yet to do a full mantel...wire,cables, receivers and the like kept me from it.  However the barbwired hubby, took it all off the mantel for me.

This opened up the experience for me.  "I think creativity is spiritual.  I absolutely believe that." said F. Murray Abraham.  I guess I had a spiritual experience right?

To begin with I created a coffee filter garland.  Good thing our coffee maker doesn't require filters, it took a lot of them.  I folded the filters in half, then half again.


Then I place each point at the ruffle line of each other. 
I made the filter X and butt together.
Then I sewed down the middle.


I hope you can see what I am explaining. 
Any questions, please ask in comments.
I continued this for the length of my mantel


I then used small nails to adhere it to the mantel.
I covered the nails with ribbon that I simply hot glued over.


Once this was completed.  I used doilies that I purchased at
Dollar Tree, I cut frilled edged circle and simple circles
on the Cricut and placed those one on top of the other.

I found some eyelet letters at Tuesday Morning.


I chose the letter to spell "HAPPY EASTER"


I cut the loops off of the letters and
placed them on top of the doily circles.


I then adhered them to the coffee filter garland with hot glue. 

I also used cup hooks to hang our Mini Tart Baskets from the mantel.


I placed the Spring Tray upon the mantel.


I used a few of the items from Blessings Unlimited
and  some items that fit with the color scheme and scene.

I think it looks very sweet and frilly.

I hope you enjoy looking at the pictures as much
as we love looking at it in person.


Maybe I will eventually get tired of looking at it.
Maybe I won't...


I suppose it will have to come down eventually.
But that will open up the chance to be creative again.

Now take some time to do something creative and thank God you were given that gift!

barbwired blessings!
Amber


Proud to link up to:
http://sumossweetstuff.blogspot.com/
http://runwithglitter.blogspot.com/
http://mygirlishwhims.blogspot.com/
http://733blog.blogspot.com/
http://www.iheartnaptime.net/
http://tatertotsandjello.blogspot.com/
 http://www.bystephanielynn.com/